This post may contain affiliate links. As an Amazon Associate, we earn a small commission at no extra cost to you.
When my husband and I bought our first home, the backyard was basically a sad patch of weeds with a lone plastic chair someone had forgotten to take with them. Our budget after the down payment? Let’s just say “limited” would be an optimistic description. But that didn’t stop us from transforming it into our favorite part of the house over one summer, using mostly weekend DIY projects and strategic budget finds.
The thing about outdoor spaces is that they don’t actually need expensive landscaping or fancy built-ins to feel special. Sometimes the coziest backyards are the ones created with creativity rather than cash—the spaces that evolve gradually through Saturday afternoon projects and marketplace finds rather than complete contractor overhauls.
Whether you’re working with a postage-stamp urban lot or a sprawling suburban space, creating a backyard retreat doesn’t have to drain your savings account. I’ve rounded up 20 Cozy And Cheap Backyard Ideas that prove you don’t need to spend a fortune to create an outdoor space that feels like a natural extension of your home—a place where memories are made under open skies.
1. DIY Fire Pit from Upcycled Materials
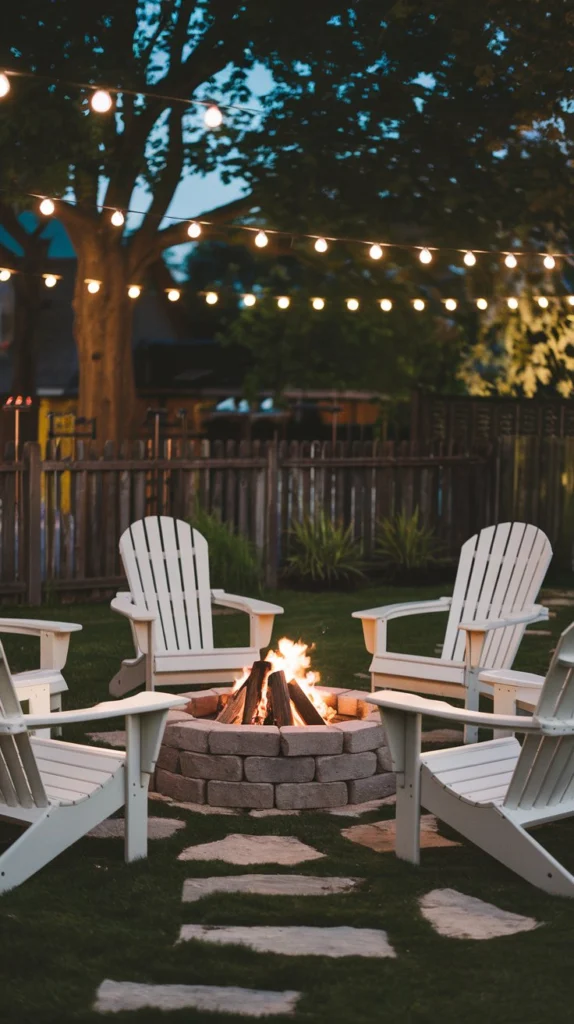
Nothing brings people together quite like gathering around a fire, and creating your own fire pit is surprisingly simple and affordable. Using materials like landscape blocks or concrete pavers from your local home improvement store, you can build a safe, attractive fire pit for under $100 that looks like it cost much more.
The simplest approach? Arrange concrete pavers or retaining wall blocks in a circle, stacking them two or three layers high. No mortar or special tools required—just arrange them in a stable configuration on level ground with a diameter of about 3-4 feet. Add a few inches of gravel at the bottom for drainage, and you’re ready for s’mores night.
For added style, consider painting the exterior of concrete blocks with heat-resistant paint in a color that complements your outdoor space. Just remember to check local regulations before building, as some areas have restrictions on open fires, and always position your pit away from structures and overhanging trees.
Recommended selections available on Amazon:

- Gift Idea for Your Mom & Dad – The Psilvam Adirondack Chair comes with 8 colors to choose from to fit your parent’s styl…
- Just like Real Wood- Psilvam high-quality adirondack chairs adopt unique wood-like color technology, we abandon the exag…
- Recyclable Materials- We use recycled polystyrene materials to replace the ever-decreasing wood. Patio chairs made in th…
2. Pallet Furniture with Colorful Cushions

Wooden shipping pallets have become the ultimate budget-friendly building material, and with good reason—they’re often available for free from local businesses and can be transformed into nearly any type of outdoor furniture with minimal tools and experience.
Start with the simplest project: a pallet sofa. Simply stack two pallets for the base, add a third upright pallet for the backrest, secure them together with screws or brackets, sand any rough edges, and finish with exterior paint or stain to protect against the elements. Add vibrant waterproof cushions (the most expensive part of this project, but still affordable compared to buying outdoor furniture), and you’ve got a custom seating area for a fraction of retail cost.
Don’t stop at sofas—coffee tables, corner benches, even day beds can be constructed from these versatile wood platforms. Just be sure to source heat-treated (HT) pallets rather than chemically treated ones, which are marked “MB” and contain potentially harmful substances you don’t want in your living space.
Recommended selections available on Amazon:


3. String Light Canopy
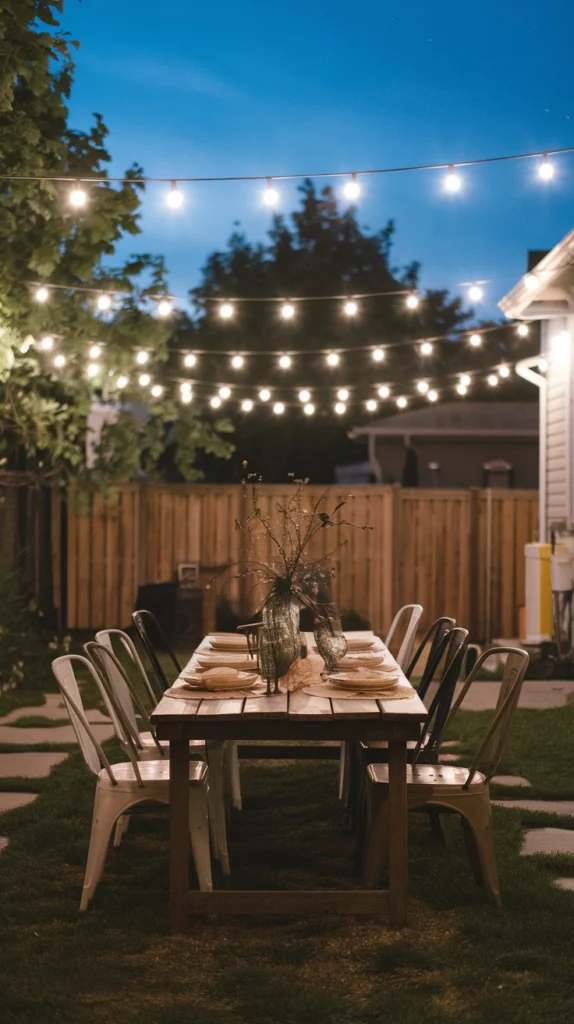
Transform your backyard into a magical evening retreat with the simple addition of string lights arranged in a canopy pattern overhead. This project creates enormous ambiance for relatively little money, especially when you catch lights on sale after holidays.
The key to making string lights look intentional rather than haphazard is creating a proper structure for them. Use wooden posts (4x4s work well), shepherd’s hooks, or even tall potted plants with sturdy branches as anchor points. String the lights in a zigzag or grid pattern overhead, maintaining consistent spacing for a polished look.
For maximum stability, avoid stretching lights too tightly—they’ll need some give to withstand wind and weather changes. And consider investing in commercial-grade lights rather than the cheapest option, as they’ll last much longer outdoors. Many budget-friendly solar-powered versions are now available, eliminating the need for outdoor outlets or extension cords.
Recommended selections available on Amazon:


4. Repurposed Container Garden

Creating a lush garden doesn’t require expensive planters—just imagination. Almost anything that can hold soil can become a charming container: vintage toolboxes, old dresser drawers, galvanized buckets, wooden crates, or even work boots at the end of their life.
The unexpected nature of repurposed containers adds personality and whimsy to your backyard while keeping costs minimal. For best results, ensure any container has adequate drainage by drilling holes in the bottom. Line wooden containers with landscape fabric to extend their life, and consider adding a layer of gravel at the bottom for improved drainage.
Arrange your containers at varying heights by placing some on overturned pots, stacked bricks, or sections of log. This vertical interest makes even a small space feel dynamic and designed. Group plants with similar water and sunlight needs together for easier maintenance.
Recommended selections available on Amazon:


5. DIY Outdoor Movie Screen
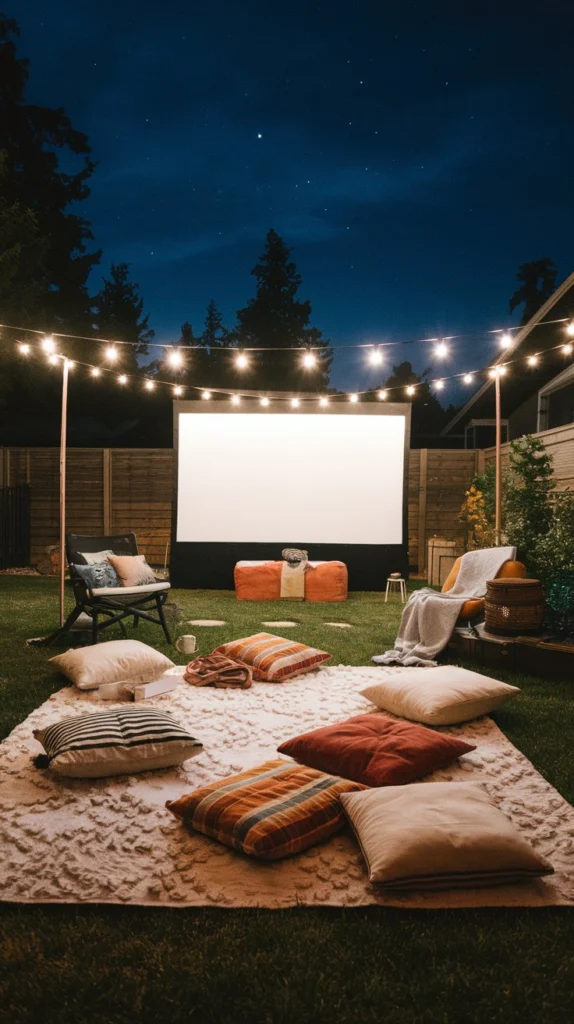
Transform your backyard into a personal cinema with a DIY outdoor movie screen that costs a fraction of commercial versions. All you need is a white sheet or drop cloth, some grommets, rope or bungee cords, and two sturdy supports.
For the simplest version, install grommets along the edges of a clean, ironed white king-size sheet or painter’s drop cloth. Stretch it between two trees, fence posts, or garden stakes using rope threaded through the grommets. For a more finished look, create a frame from PVC pipes that can be assembled and disassembled for storage.
Pair your screen with a portable projector (the main investment in this setup, though affordable options have proliferated in recent years) and wireless speakers. Add floor cushions, lawn chairs, and perhaps some string lights turned low, and you’ve created magical movie nights that the neighborhood will envy.
Recommended selections available on Amazon:
- FEATURES – The Throw provides a luxurious addition to your home decor. Bohemian medallion design throw, can also double …
- This blush cotton throw flaunts a tufted tufted chenille design with a 4-inch fringe on each end that adds texture and d…
- The 100% cotton fabric creates a lightweight and natural feel, making this cottage throw perfect summer blanket and idea…
6. Poured Concrete Stepping Stones
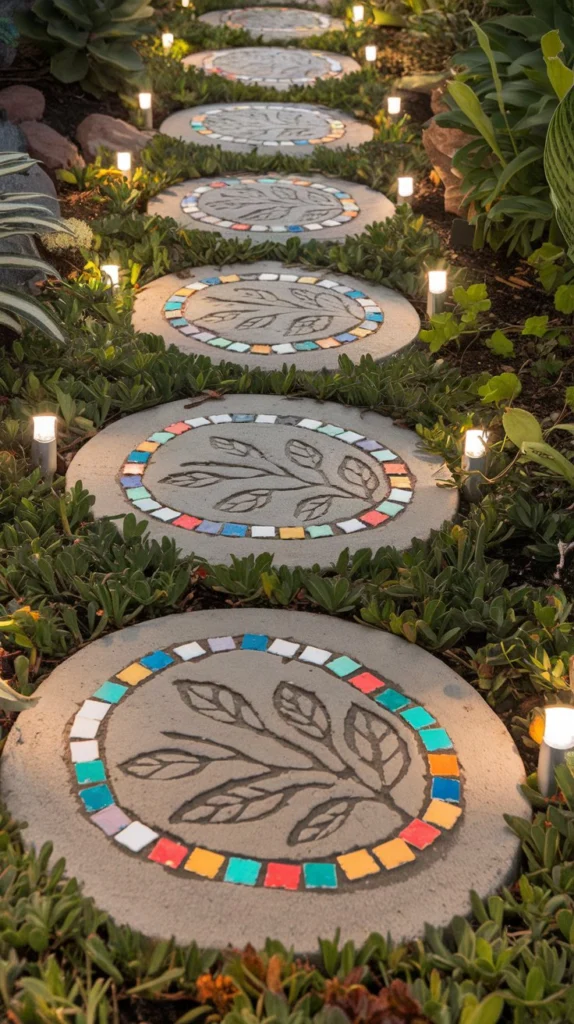
Create a charming garden path or functional walkway with DIY concrete stepping stones that cost a fraction of store-bought versions. With basic materials from any home improvement store—concrete mix, plastic molds or even repurposed container lids—you can create custom pavers that add structure to your outdoor space.
Get creative with decorative elements pressed into the wet concrete: leaf impressions, handprints, mosaic tiles, or even inspirational words stamped with letter sets. If color coordination matters to your space, add concrete pigment to the mix for custom-tinted stones that complement your outdoor color scheme.
For a cohesive look, create a simple pattern with your stones rather than placing them randomly. Straight lines work for formal spaces, while gentle curves create a more relaxed, whimsical feeling. Space the stones at a comfortable walking distance—about 24 inches from center to center for most adults.
Recommended selections available on Amazon:


7. Painted Fence Mural
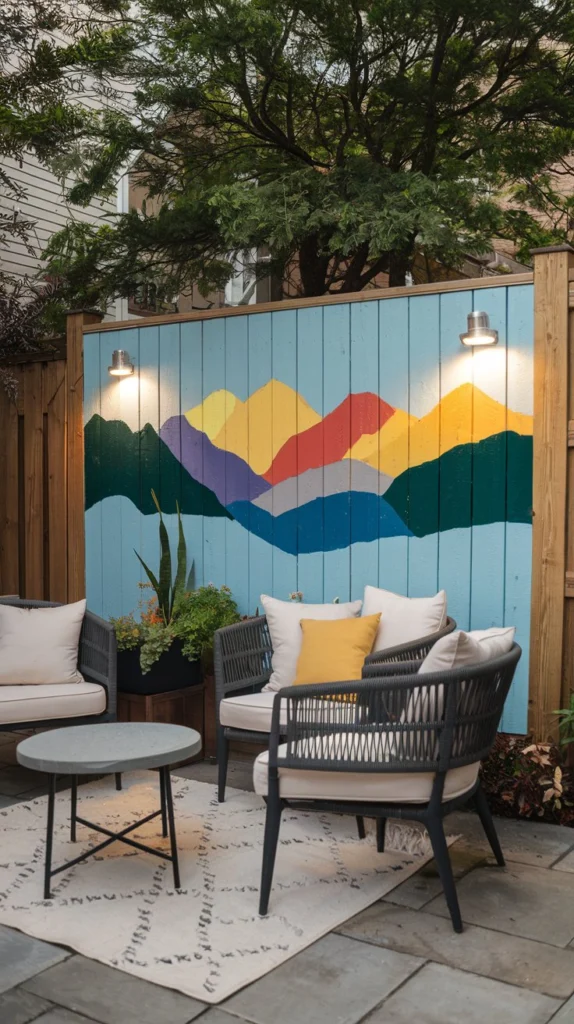
Transform a plain fence or garden wall into an artistic focal point with a painted mural that extends your outdoor living space visually. This project requires little more than exterior paint and imagination, making it one of the most affordable backyard transformations with major impact.
For those not confident in their artistic abilities, simple geometric patterns can be created using painter’s tape as a guide. Gradient ombré effects are also relatively easy to achieve by gradually mixing white paint into your base color as you move upward or across the fence.
More ambitious artists might create trompe l’oeil scenes that create the illusion of extended space—perhaps a pathway disappearing into a forest, a Mediterranean courtyard, or distant mountains. Even if your skills are limited, simple silhouettes of trees, mountains, or city skylines can create dramatic impact with minimal artistic ability required.
Recommended selections available on Amazon:

- Polyester
- [CHIC DESIGNER DETAILS]: Add a chic touch of style to the patio, backyard, porch, sunroom, deck, or terrace with this st…
- [COMFORT & DURABILITY]: Crafted from black faux wicker and flat rattan with rope detailing and grey cushions
8. Solar Path Lights from Repurposed Objects
Illuminate your garden pathways with unique solar lights created from repurposed glass objects. Old glass light fixtures, mason jars, wine bottles, or even vintage glass insulators can be transformed into one-of-a-kind lighting with the addition of inexpensive solar components.
The simplest approach is to remove the solar components from basic pathway lights (often available in multi-packs for under $20) and install them into the tops of your glass containers. Clear or lightly colored glass works best for maximum light transmission.
Arrange your custom lights along walkways or intersperse them with plants for gentle evening illumination that guides guests through your yard after sunset. The varied heights and shapes create much more visual interest than uniform commercial path lights, while the solar technology means zero ongoing electricity costs.
Recommended selections available on Amazon:

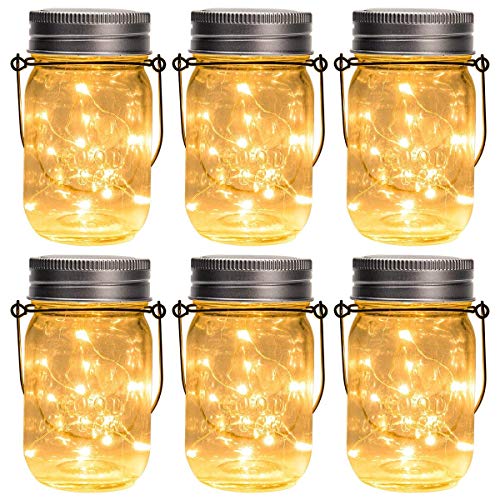
- 𝐉𝐮𝐬𝐭 𝐚 𝐋𝐢𝐭𝐭𝐥𝐞 𝐌𝐨𝐫𝐞, 𝐆𝐞𝐭 𝐃𝐨𝐮𝐛𝐥𝐞 𝐓𝐡𝐞 𝐃𝐞𝐥𝐢𝐠𝐡𝐭 -12 Lamp Sets : At night, Mason Jar Lights like the lanterns filled with fire…
- 《 No More Fakes, Only Facts – 12 Lanterns Set》Forget those “600mAh” solar lights that barely last an hour. Lab-tested? T…
- 《 Built for Patios, Ready for Praise》When the sun hits, our next-gen solar lids devour sunlight faster than ever—even on…
9. Vertical Pallet Garden
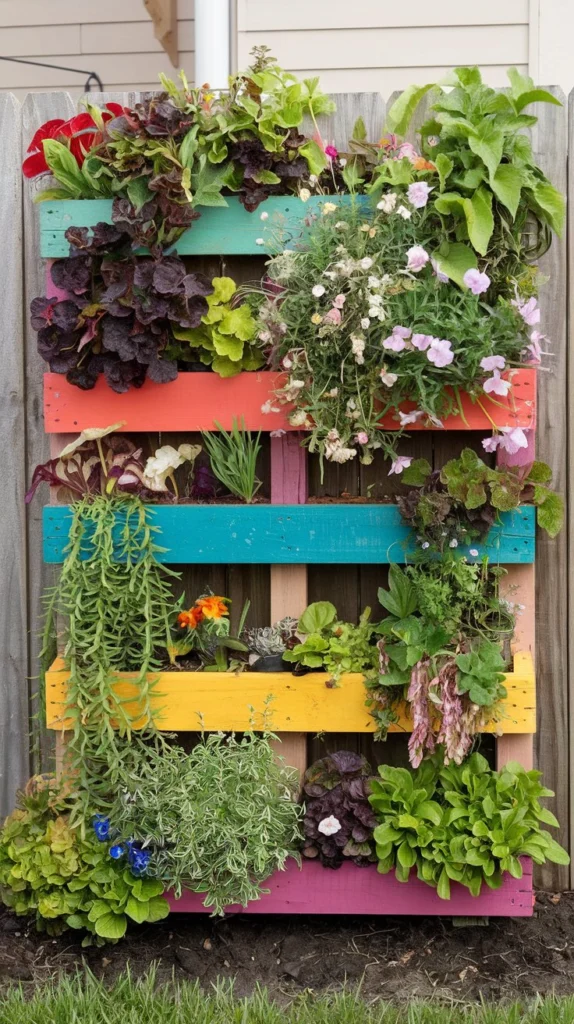
Maximize growing space in small backyards by taking your garden vertical with a pallet transformed into a living wall. This space-efficient solution allows you to grow flowers, herbs, or even small vegetables in minimal horizontal space.
Start with a heat-treated wooden pallet in good condition. Attach landscape fabric to the back and bottom using a staple gun, creating pockets between the slats that will hold soil. Stand the pallet upright against a fence or wall (securing it for safety), then fill the pockets with potting soil and add your plants.
For best results, allow your pallet garden to grow for a few weeks while lying flat before moving it to the vertical position. This gives plants time to establish their root systems. Choose cascading or trailing varieties for the most dramatic effect, and group plants with similar water and light requirements together.
Recommended selections available on Amazon:


10. DIY Outdoor Bean Bag Chairs

Create comfortable, casual seating perfect for backyard lounging with DIY bean bag chairs that cost far less than commercial outdoor furniture. Using waterproof fabric like marine vinyl or outdoor canvas, you can create durable seating that stands up to the elements.
For a basic round bean bag, cut two circles of fabric approximately 60 inches in diameter. Sew them together around the edge, leaving an opening for filling. For a more structured shape, create a pattern with multiple panels that form a supportive back. Fill with polystyrene beads (the most significant cost in this project, though still affordable when purchased in bulk) or for a more eco-friendly alternative, try recycled foam pieces.
The beauty of DIY seating is customization—choose fabrics that complement your outdoor color scheme, add carrying handles for easy repositioning, or create varying sizes for adults and children. For maximum longevity, store these inside during harsh weather or heavy rain.
Recommended selections available on Amazon:

- This product contains no fillers, can be filled with soft things in DIY, easy to disassemble and wash, sofa and decorati…
- soft and comfortable. Seperate cover and filling for easy cleaning, cover machine wash or hand wash.
- Ergonomic design, perfectly supporting your body and comfortable to seat.
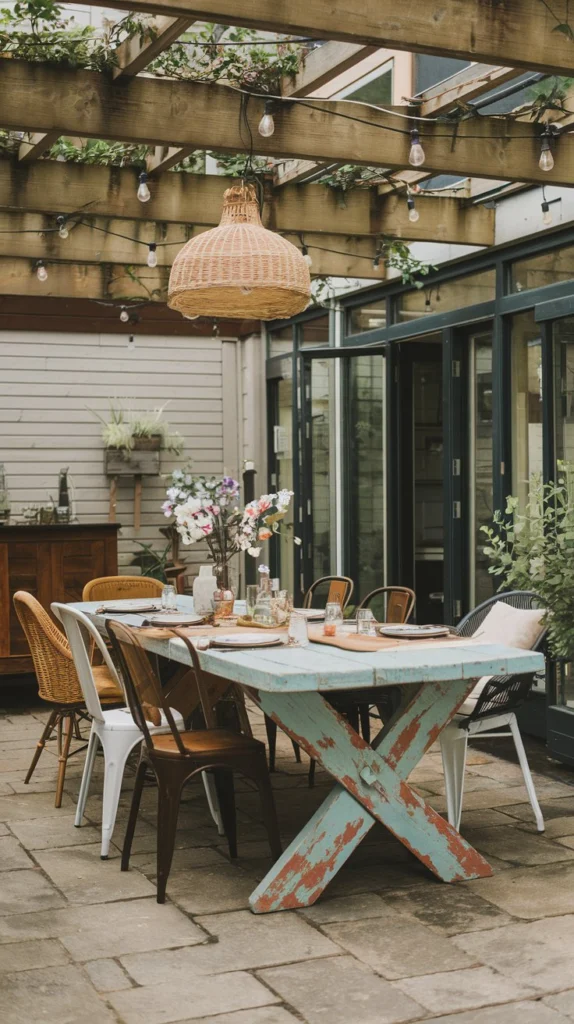
11. Reclaimed Wood Outdoor Table

Build a rustic dining or coffee table for your outdoor space using reclaimed wood—think weathered fence boards, pallets, or even driftwood depending on your location. The character of used wood brings immediate warmth and history to your backyard.
For a simple dining table, secure boards across two sawhorses for a farmhouse-inspired look that can be disassembled for storage. More ambitious builders might create a traditional table with legs from 4×4 posts and a top made from aligned boards secured to supporting beams underneath.
Finish your creation with exterior-grade polyurethane to protect against moisture while maintaining the wood’s natural character. The beauty of reclaimed wood is that perfection isn’t expected—minor differences in color and texture add to the charm rather than detract from it.
Recommended selections available on Amazon:

- 🌿【Pine Dining Table】 This dining table features a vintage table top and heavy-duty hollowed legs with understated elegan…
- 🌿【Strong & Resistant】 Made of high quality pine wood, this board is carefully selected, and unlike ordinary dining table…
- 🌿【Multiple Occasions】The elegant table can be used not only in your home dining area, but also can be used in a variety …
12. Upcycled Tire Ottoman
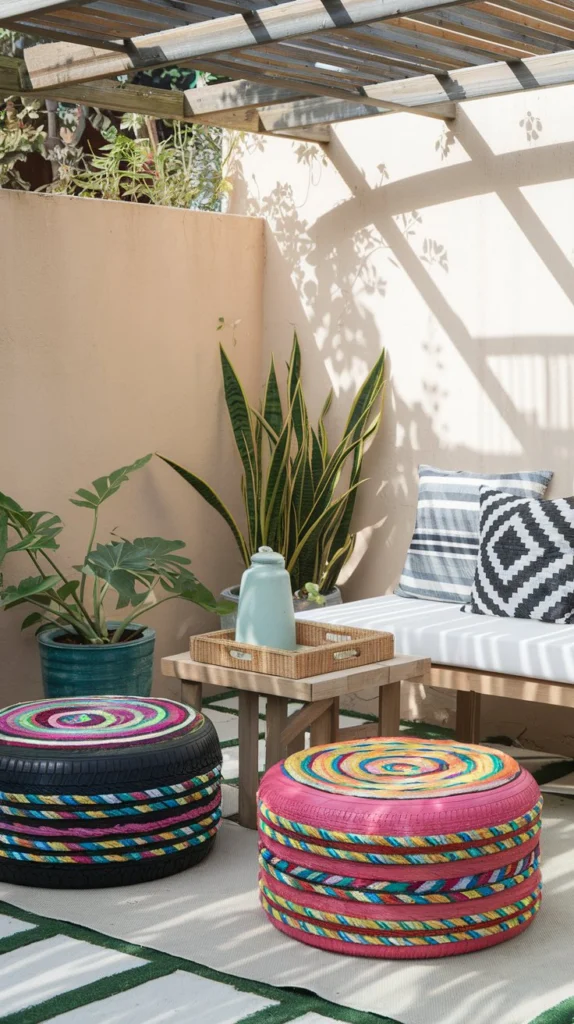
Transform old tires—often available for free from auto shops—into stylish, weather-resistant ottomans that provide both seating and personality for your backyard. This project repurposes materials headed for landfills while creating functional furniture at minimal cost.
Clean your tire thoroughly, then wrap it with rope, fabric, or even colorful outdoor rugs secured with heavy-duty adhesive. Add a circular piece of plywood to the bottom for stability, and another to the top, padded with foam and covered with waterproof fabric for comfort.
For added functionality, choose a tire size large enough to double as a small table when topped with a tray. Create several in different heights and diameters for versatile seating options that can be easily rearranged depending on your gathering needs.
Recommended selections available on Amazon:
- 18.5 inches long x 13.25 inches wide x 3 inches high
- Hand Woven from rattan with a off-white/latte finish
- Wipe clean with damp cloth
13. Budget-Friendly Shade Sail Installation
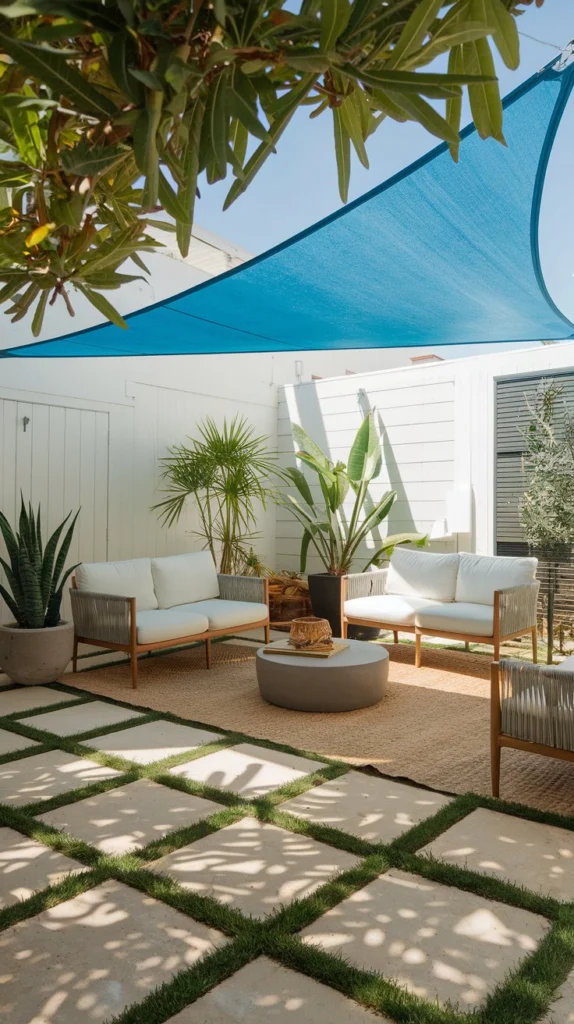
Create much-needed shade for hot summer days with affordable shade sails that dramatically improve the usability of exposed backyard spaces. These triangular or rectangular fabric panels can cover seating areas, children’s play spaces, or even casual outdoor dining spots for a fraction of the cost of permanent structures.
While commercial shade sails can be purchased relatively inexpensively (especially during end-of-season sales), the mounting hardware often costs more than the sail itself. Save by creating your own anchoring system using eye bolts secured to fence posts, trees, or the exterior of your home. Just ensure all mounting points are sturdy enough to withstand wind stress.
Install your sail with slight tension rather than perfectly flat—this allows rainwater to run off rather than pooling in the center. For maximum cooling effect, choose light colors that reflect rather than absorb heat, and position your sail to block the strongest midday and afternoon sun.
Recommended selections available on Amazon:

- 【UV Protection & Cooling】Made of 100% brand new High Density Polyethylene material and eliminate the use of splicing fab…
- 【Measuring Dimensions】Measure and clean the area where the Sun visor is to be installed. Leave a margin of 0.5-1 feet be…
- 【Customizable size】SUNNY GUARD provide custom sized sun shade sail to fit your outdoor space.Made in USA.To further unde…
14. Pebble Mosaic Garden Feature
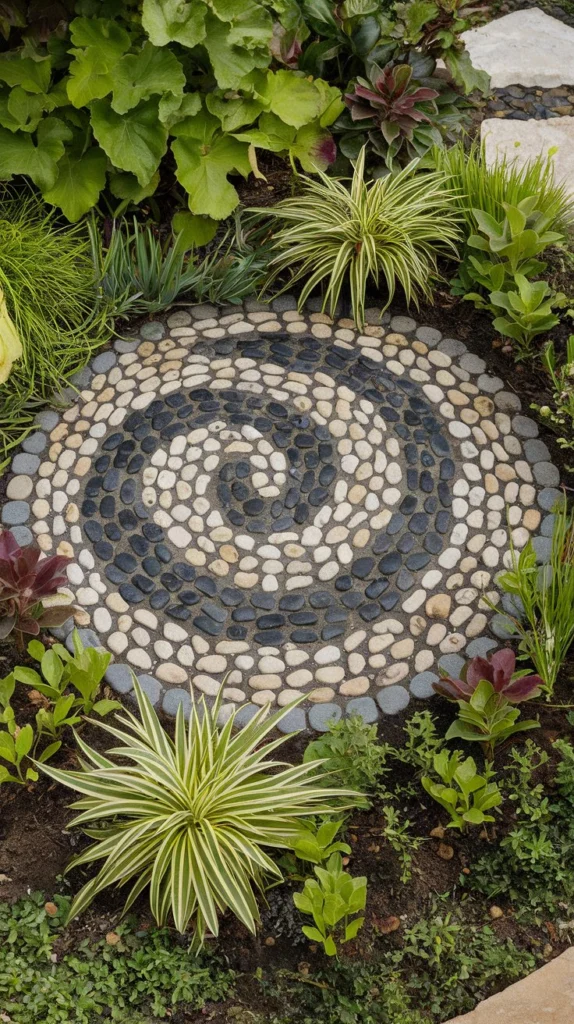
Create artistic focal points in your garden with pebble mosaics that cost little more than sweat equity. Using readily available river stones or beach pebbles, you can create patterns, images, or geometric designs that add permanent beauty to your outdoor space.
For a simple project, create a circular medallion around a tree or in the center of a garden bed. More ambitious designs might include pathways with borders, house numbers for your garden gate, or even representative images like flowers, animals, or abstract patterns.
To create your mosaic, excavate the area to about 3 inches deep, add a layer of sand for leveling, then arrange your stones in your desired pattern. Set them in place with a mixture of sand and cement for permanence. The result is a one-of-a-kind feature that adds artistic interest to your garden while requiring virtually no maintenance once completed.
Recommended selections available on Amazon:


15. Climbing Plant Privacy Screen
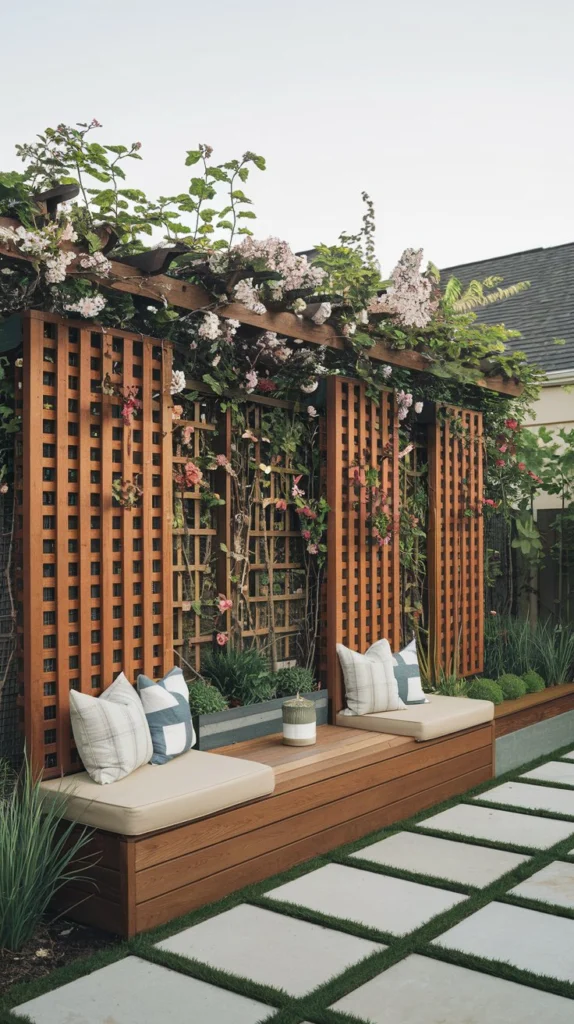
Create natural privacy and define outdoor “rooms” with trellises covered in climbing plants—a living fence that costs far less than building traditional barriers while adding beauty and even habitat for beneficial insects and birds.
Construct simple trellis panels using wooden lattice, cattle panels, or even repurposed materials like old bed springs or bicycle wheels—anything with openings that vines can climb through. Install these between posts secured in the ground, ensuring they’re stable enough to support the eventual weight of mature plants.
Choose fast-growing climbers appropriate for your climate: morning glories for seasonal coverage, clematis for beautiful flowers, jasmine for fragrance, or grape vines for both privacy and eventual fruit. Within a single growing season, these plants can transform bare frameworks into lush green walls that provide both privacy and natural cooling for your outdoor space.
Recommended selections available on Amazon:

- 【Multi-purpose privacy screen】This privacy screen has a wide range of uses. Indoors, it can be used as a partition betwe…
- 【All solid wood material】All solid wood material is a highlight of this privacy fence. Each piece of wood has been caref…
- 【Bottom flower box design】The bottom flower box design is the creative feature of this garden fence. You can plant vario…
16. DIY Concrete Block Bench
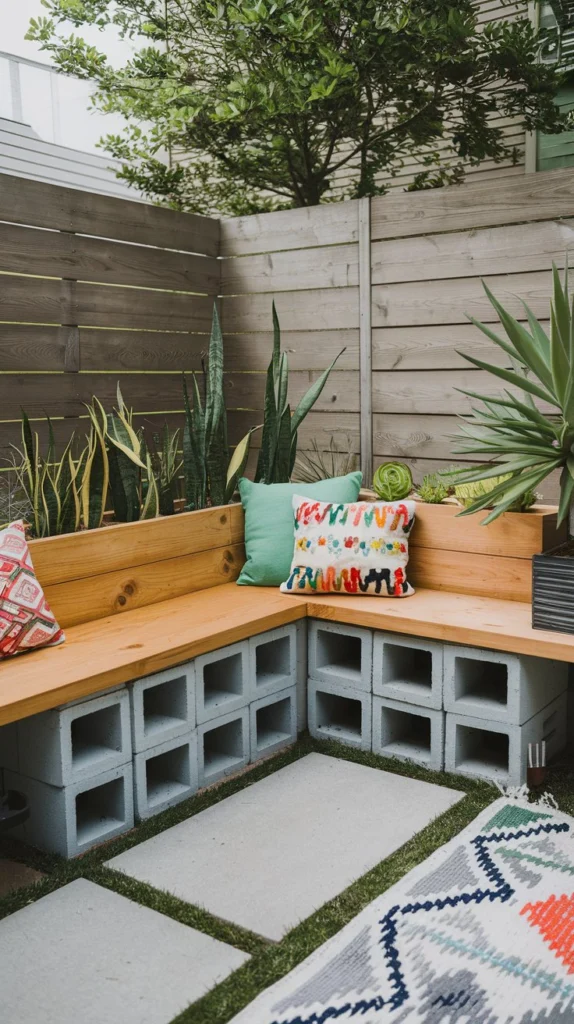
Create durable, modular seating with concrete blocks and wooden beams—a project that requires no special skills and can be assembled in an afternoon. The industrial aesthetic works particularly well in contemporary outdoor spaces, while the sturdiness ensures years of use.
The simplest design uses standard 8x8x16 concrete blocks placed in a “U” formation, with 4×4 wooden beams spanning the top to create the seating surface. For comfort, add outdoor cushions that can be stored during inclement weather. Paint the blocks in coordinating colors for a more finished look, or leave them natural for an industrial vibe.
The beauty of this project lies in its flexibility—expand or reconfigure your seating as needed, create corners or straight runs depending on your space, and easily disassemble if you move or want to try a different arrangement. For added functionality, leave some blocks hollow to serve as integrated planters or side tables.
Recommended selections available on Amazon:


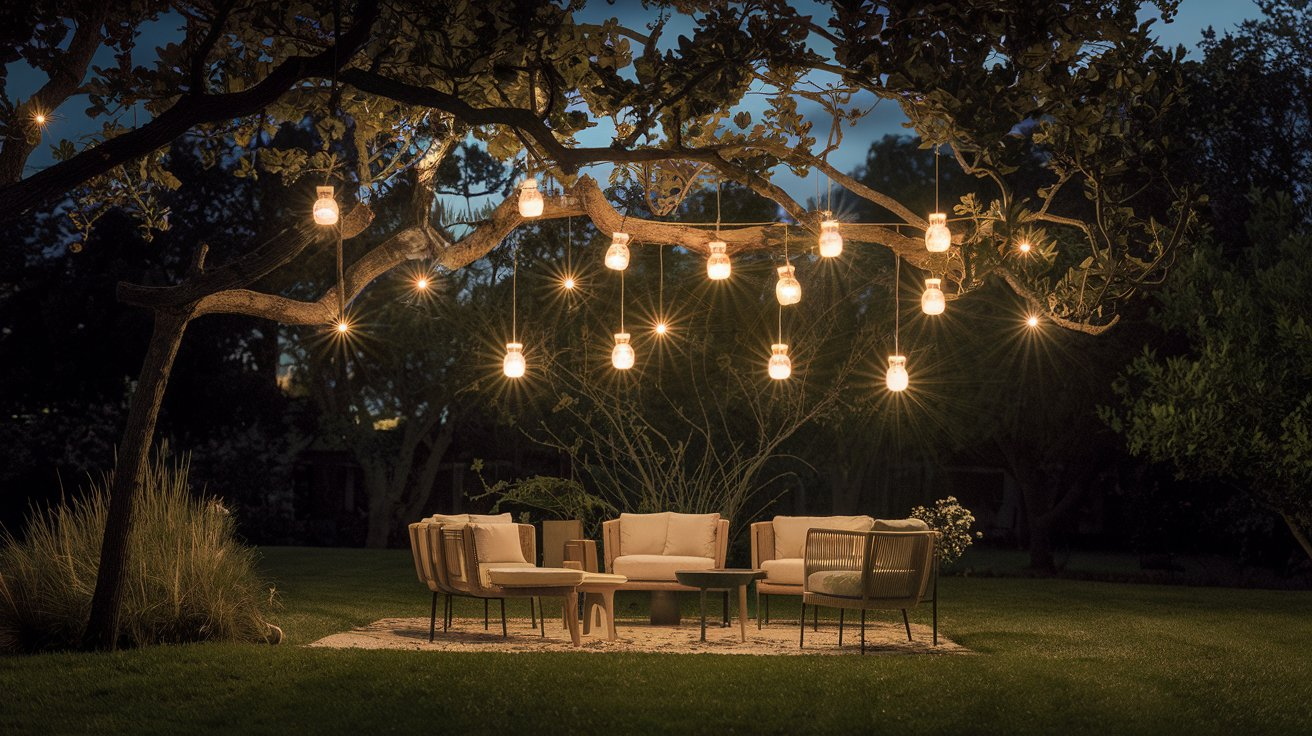
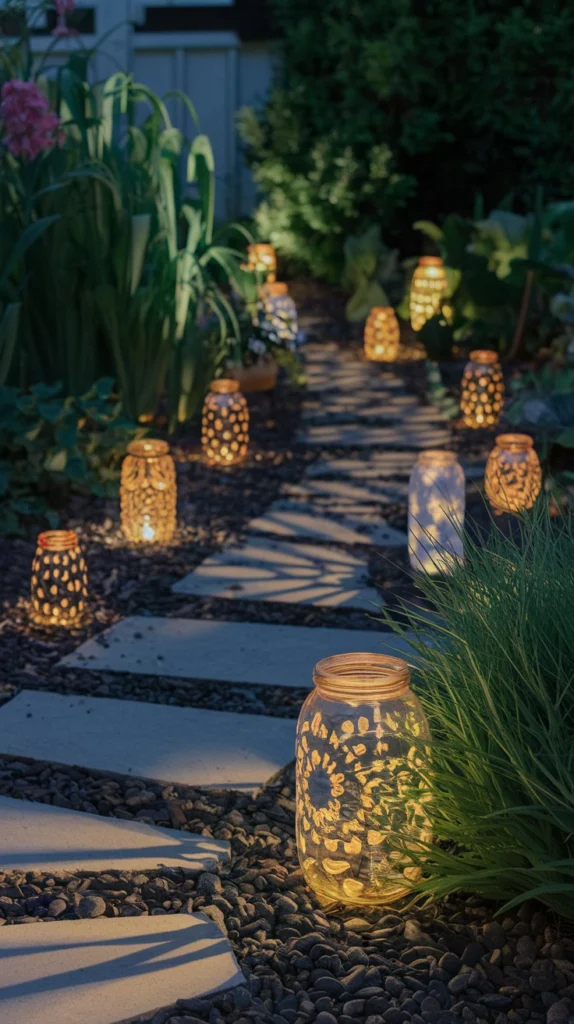
17. Solar Jar Lanterns
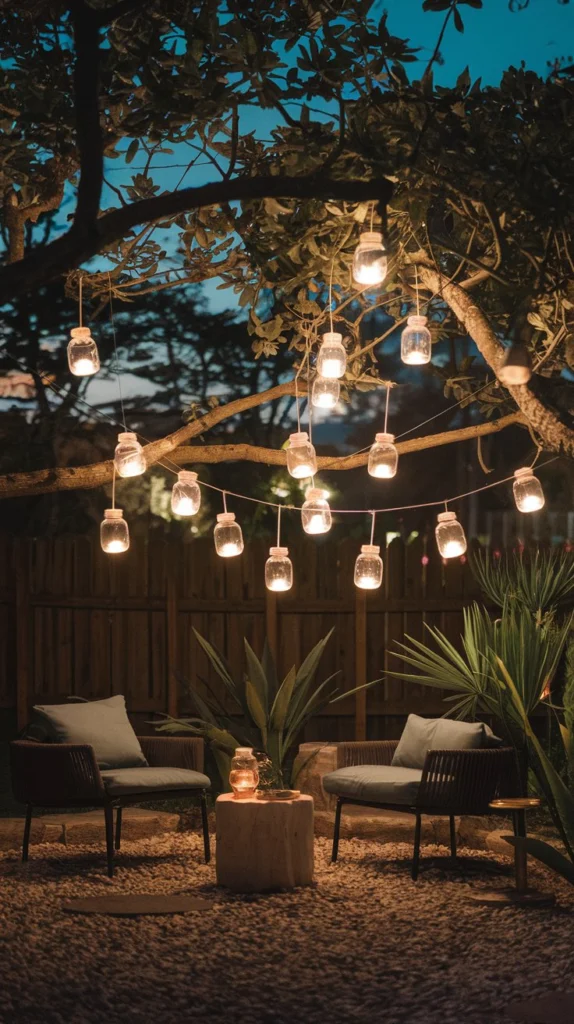
Create magical evening ambiance with solar-powered jar lanterns suspended from trees or shepherd’s hooks throughout your backyard. This simple project uses inexpensive solar path lights combined with glass jars to create custom lighting that costs nothing to operate.
To make each lantern, remove the solar component from an inexpensive path light (available in multi-packs at most home improvement stores) and attach it to the jar lid. The solar cell remains outside to capture sunlight, while the LED drops inside the jar to create a glowing lantern effect after dark.
Use wire to create hanging handles for your jars, then suspend them at varying heights throughout your outdoor space. Group several in trees for a “floating lantern” effect, line pathways for gentle illumination, or cluster them on tables as centerpieces for outdoor dining. The soft, warm glow transforms ordinary evenings into something magical.
Recommended selections available on Amazon:

18. Painted Patio Floor Pattern

Transform a plain concrete patio pad from utilitarian to extraordinary with painted patterns that create the look of expensive tile or stone for the cost of a few cans of exterior floor paint. This project can completely change the feel of your outdoor space while requiring only basic painting skills.
Start by thoroughly cleaning and etching your concrete surface. Apply a base coat in your chosen background color, then use painter’s tape to create geometric patterns like diamonds, herringbone, or even faux tile grids. Stencils can add more intricate designs if you want something beyond straight lines.
For longevity, finish with several coats of clear exterior sealer designed for foot traffic. This protective layer helps your design withstand weather and regular use. The result is a custom patio surface that looks like a professional installation for a fraction of the cost.
Recommended selections available on Amazon:


19. Repurposed Door Garden Table
Turn an old wooden door into a characterful outdoor dining or buffet table that becomes the centerpiece of your backyard entertaining space. These substantial pieces add instant character while repurposing materials that might otherwise end up in landfills.
Remove any hardware from your door, sand rough edges, and apply exterior paint or sealant for weather protection. Mount it on stable legs—perhaps metal sawhorses for an industrial look, wooden posts for rustic charm, or even stacked concrete blocks for modern simplicity.
For dining height, position at approximately 30 inches tall. For a serving buffet or bar height table, aim for about 42 inches. The rectangular shape of doors makes them perfect for larger gatherings, while their solid construction ensures stability for years of outdoor use.
Recommended selections available on Amazon:

- Perfect Fit :Fitted for 96×30 Inch Rectangular Table. As our fitted table cloths have an inner elastic lining all the wa…
- 【Preferred Material】Made of high-quality polyester, easy to clean.
- 【Applicable Scenario】Suitable for outdoor tablecloths for picnics, dining, restaurants, hotels, courtyard tables, etc.
20. Backyard Game Station
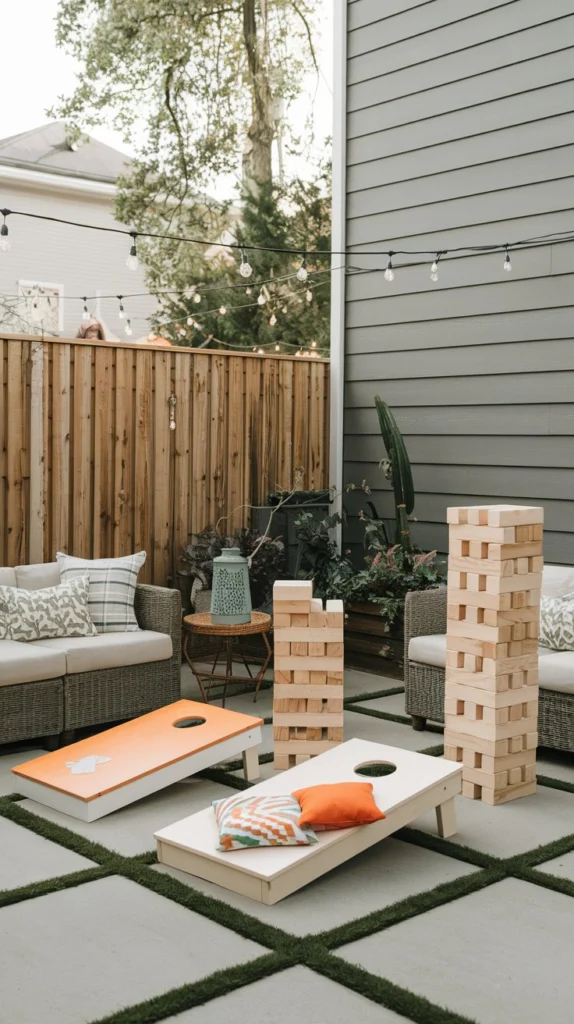
Create an activity zone in your yard with DIY lawn games that cost a fraction of commercial versions. From cornhole boards made from plywood to giant Jenga sets cut from 2x4s, homemade games add entertainment value to your outdoor space without significant investment.
Dedicate a corner of your yard to these activities, perhaps with a small storage bench or weatherproof container nearby to keep game pieces protected when not in use. A section of flat lawn or a level pea gravel area provides the perfect playing surface.
Consider creating a scoreboard from a repurposed cabinet door painted with chalkboard paint, adding solar lighting for evening play, and including seating for spectators. This designated fun zone becomes a natural gathering spot that encourages outdoor time and friendly competition for all ages.
Recommended selections available on Amazon:


Bringing It All Together
Creating a cozy backyard retreat doesn’t require landscape architects or contractors—just creativity, a little elbow grease, and strategic spending on materials that make the biggest impact. The most inviting outdoor spaces often evolve organically over seasons of weekend projects and marketplace finds rather than emerging fully formed from expensive professional installations.
Remember that the best backyard for you is one that reflects your lifestyle and meets your actual needs—not necessarily what looks perfect on social media. Perhaps you need a space for kids to play, a cozy corner for morning coffee, or an evening gathering spot for friends. Prioritize those functional elements first, then add aesthetic touches that personalize the space.
I’d love to see how you transform your outdoor areas on a budget! Check out these 20 Boho Outdoor Patio Decor Ideas to kickstart your next makeover.
And if you found these ideas helpful, please share this post with fellow homeowners looking to create outdoor magic without breaking the bank.
Your perfect backyard retreat is closer—and more affordable—than you might think!